How To Export Contacts From Salesforce

Today, there are many customer relationship management (CRM) tools in the market available for businesses to enhance their customer relationships. One of them is Salesforce, a popular CRM platform that brings sales, marketing, commerce, service and IT teams to work together anywhere effectively.
With Salesforce, you can add contacts of businesses and individuals that you do business with efficiently. At some point, you may want to export your Salesforce contacts for analysis, clean up or you want to try out another CRM tool, etc. It is quite straightforward. This quick guide takes through a step by step guide on how to export contacts from Salesforce.
Steps on How to Export Contacts from Salesforce
Since you have been using Salesforce, you just have to log in to your account and follow these easy steps.
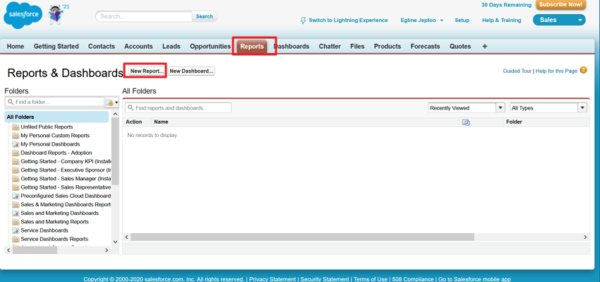
Step 1. Once you log in to Salesforce, hover to the navigation menu and click on the “Reports” tab. After that, click on the “New Report” tab.
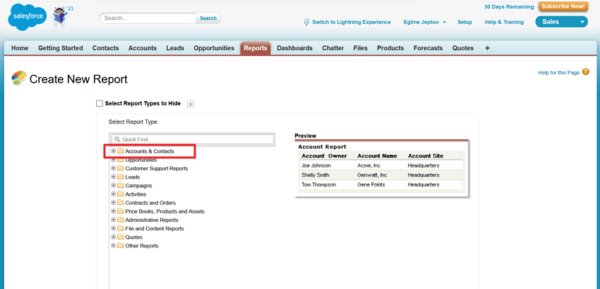
Step 2. A new window will pop up. Click on the “Accounts & Contacts” tab.
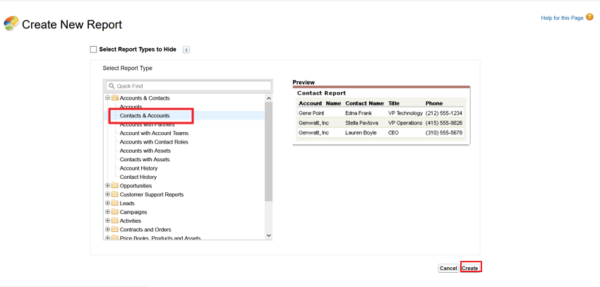
Step 3. Next, click on “Contacts & Accounts” and scroll down the right to click on the “Create” button.
Step 4. A preview of the contact list will then appear. This preview consists of the following titles: Salutation, First Name, Last Name, Title, Mailing Street, Mailing City, Mailing State or Province, Mailing Zip or Postal Code, Mailing Country and Phone just to mention a few.
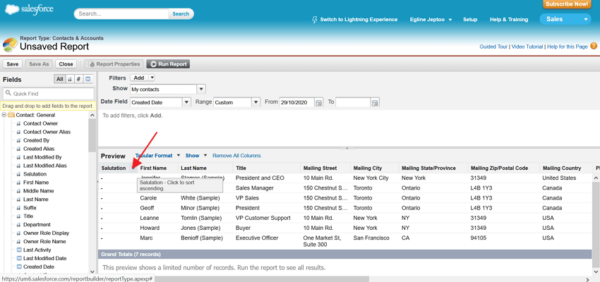
You need to remove most of these columns and remain with First Name, Last Name, Phone and Email columns. To do so, click on the arrow down button on each column and click on “Remove Column.”
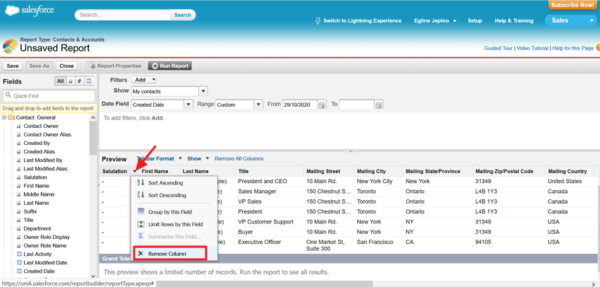
Step 5. Once you have removed the undesired contact columns, you can now click on the “Run Report” button to refresh the fields.
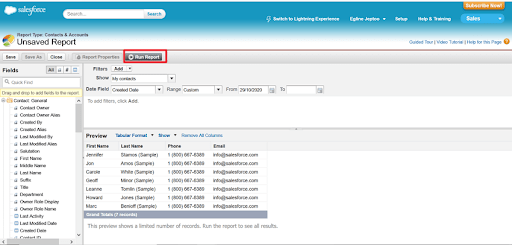
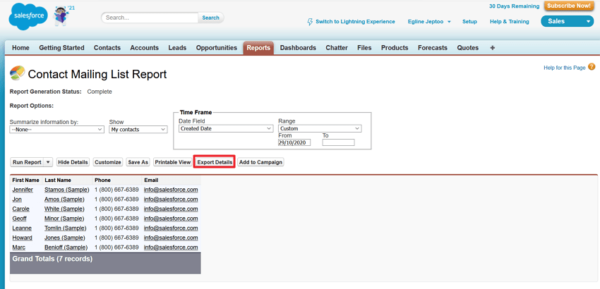
Step 6. After that, click on the “Export Details” button.
Step 7. Next, the export window will appear. Go to the “Export File Format” icon and choose the “Comma Delimited.csv” format.
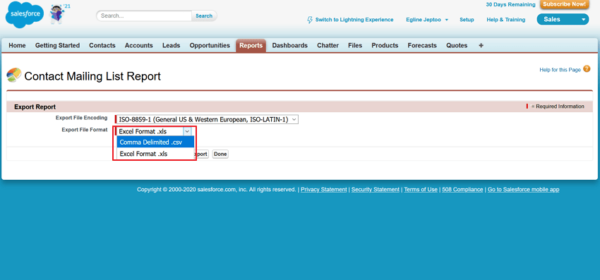
Step 8. Finally, click on the “Export” button. A pop window will appear that enables you to save the CSV file on your computer. Click on “Save File” and select “OK” to save the file.
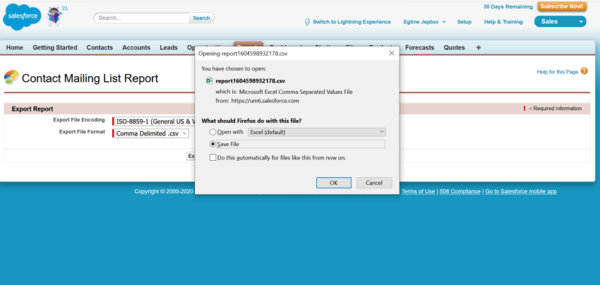
Good work! You have exported the contacts from Salesforce to your computer in .csv format.
Wrapping up
The beauty of Salesforce is that it enables you to export your contacts in CSV and Excel formats. After exporting your contacts from Salesforce, you can then import them to Covve app so that you can set automatic reminders, get news alerts concerning your contacts, personalize activities and notes as well get daily backups of your contacts. Covve is integrated with Salesforce for a seamless experience!
Download the Covve app for iOS or Android now and enjoy the top-notch experience!