The need to send emails to a group arises both in our personal lives and our businesses. if you belong to a project team or committee at work, you may need to send an email to the group or you may need to send emails to your immediate family members.
Whatever your reason might be, learning how to create a contact group in Outlook will save you a ton of time.
The advantage of creating a contact group is that you don’t have to add each email address to the Cc, Bcc and To lines.
For Microsoft Outlook, the terms “Contact group” and “Distribution list” can be used interchangeably.
Step 1: On your Windows computer, open the Outlook application.
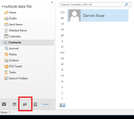
Step 2: At the bottom left of the window, click on “People”.
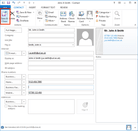
Step 3: From the ribbon displayed, click on “New Contact Group”.
Step 4: Enter the name of your new group.
Another way to go is to click on “New Items” on the Home tab menu.
Then select more items, and click on “Contact Group” from the array displayed.
If you want to add contacts to your newly created group, select “Add Members” from the ribbon. You will have the option of adding members from your address book or Outlook contacts. You will also have the option of creating new contacts.
If you wish to add members from your address book or Outlook contacts, double click the contact name on the pop up window. You will see it added to the members area at the bottom. Once you are done, click on OK.
If it is a new contact you are adding, insert their name and their email address appropriately, then click on OK.
After adding all the members you wish to add to the group, click on Save, and then click on Close.
We are obsessed with everything about contacts. Our obsession led to Covve, the simplest, smartest contacts app, check it out!
Written on 14 Feb 2020.
Get the latest insights with The Networker, our bi-weekly newsletter.
Related Posts:


