The Macbook is the laptop that many professional around the world choose to use. If you’re running your business on the go then of course you’ll want to add an extra professional element to your communications.
Adding a digital signature to your email is a simple process if you have a Mac Mail.
To create your email signature to your Mac Mail, and also add a logo, you just need to follow these simple instructions:
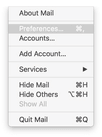
Open the Mac Mail app and go to ‘Mail’ then ‘Preferences’
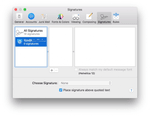
You will see the ‘Signatures’ tab across the top, click it.
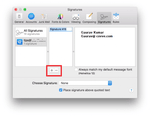
Once you are in the tab, you’ll be able to edit an existing signature or create a new one. If you want a new signature, hit the ‘+ icon’.
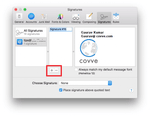
To add an icon or image to your signature, just locate the image on your Mac using the Finder. You can then drag and drop the icon onto the signature, exactly where you want it to appear.
And that’s it! Simple right?
To add the signature to your emails you can select the signature from the drop down in the ‘From’ field.
Note that you can add different signatures so you can choose what to share with who at the click of a button.
Want to create an electronic business card or your own QR code to quickly share your profile? Covve allows you to quickly share contact details and makes sure your contacts are always up to date. Find out more about Covve.
Written on 23 May 2019.
Related Posts:


